Computer Set Up#
Participation in the MolSSI Best Practices Workshop will require using your own personal computer or laptop and installing some software.
Windows users take note
If you are working on a Windows computer, participation in this workshop will require you to install the Windows Subsystem for Linux (WSL). You should install WSL 2, you will need to have the Windows 10 or Windows 11 OS with the following version requirements:
For x64 systems: Version 1903 or higher, with Build 18362 or higher.
For ARM64 systems: Version 2004 or higher, with Build 19041 or higher.
If you haven’t updated your computer in a while, these updates could take a considerable amount of time. Plan accordingly!
If you are on Windows 11, you can also set up WSL to be able to use graphical interfaces.
As an alternative to WSL, or in addition to it, you can setup and use a Docker container to follow along with the workshop.
Please follow the instructions given here to make sure you have the necessary software installed. We will be using Python and the conda package manager. If you are on MacOS, Linux, or WSL and you already have Anaconda (or Miniconda) installed, skip to the environment creation portion of these set-up instructions. If you do not have Anaconda or Miniconda installed please see the appropriate section below. Note If you are on Windows Miniconda has to be installed on WSL (not Windows). This might be a separate installation.
Anaconda vs. Minconda
Anaconda is a distribution of Python, the conda package manager, and several third-party libraries that are commonly used in data science. Miniconda contains only Python and the conda package manager. You will be able to install any package you would like later using Miniconda. Miniconda will take up a lot less space on your computer. We will be learning to manage conda environments and install the packages we need, so we consider Miniconda to be the better option between the two. If you already have Anaconda installed, however, there is no need to install Miniconda.
Ensure that your conda version is up-to-date
If you already have conda installed using Anaconda or Miniconda,
you should make sure your conda version is up-to-date.
Ensuring you have an up-to-date version of conda will ensure that you are more easily able to install the packages we will be using in this workshop.
conda update -n base conda
Installing WSL (Windows users only)#
If your computer uses the Windows operating system, we require installing Windows Subsystem for Linux (WSL). Follow the installation instructions at this link. If you don’t have a preference for Linux distribution, we recommend installing Ubuntu 22.04.
Once WSL is installed, open your ‘Start’ menu and choose ‘Ubuntu’. This will open a terminal window. A terminal is an interface you can use to interact with your computer using text. The first time you open Ubuntu, you may see a message which says “Installing, this may take a few minutes…”. After the installation is done, you will have to create a username and password. After these are created, you should be able to use the terminal.
The Windows Subsystem for Linux is like running another computer inside your computer. It is a different operating system with different software installed than your Windows computer. For the WSL, you have to install Miniconda from the terminal in your Linux operating system. Note that if you are using the WSL, your Linux OS is completely separated from your Windows operating system. This means that software installed on one operating system is not available on the other. If you are running the Windows 11 operating system, you can set up WSL to use graphical interfaces on your computer. Otherwise, you will only be able to interact with WSL through the terminal (and the text editor VSCode, see later in the set-up for information on how to use VS Code in WSL).
Docker (Optional Alternative)#
If you would prefer to use Docker instead of setting up an environment on your own machine, a Docker image has been prepared to get you most of the way through setup. Note this is an optional alternative to setting up conda on your computer. First, follow the instructions to install Docker on your computer. Then run the following command in a terminal
docker pull ghcr.io/molssi-education/python-best-practices-container:latest
Once the image has been pulled to your local machine, you can run an interactive terminal to continue following along with the instructions. Be sure to replace local_path in the command with the path to the location on your computer you would like to save your files.
docker run -it --name molssi_best_practices -v local_path:/work ghcr.io/molssi-education/python-best-practices-container
Once the container is running, you will want to move into the directory shared with your computer using
cd work
You do not need to install conda, git, or the cookiecutter using this container, so you may skip ahead to Configuring Git.
To exit your container, simply run exit from the command line.
You can then restart the container by running
docker start -i molssi_best_practices
moving into the work directory and resuming your work.
Miniconda Installation#
You can install Miniconda through a graphical interface or using your terminal. Pick either “Graphical Installation” or “Text-based (terminal) Installation”. If you are using WSL, it may be easiest to complete this using the terminal installation.
Graphical Installation#
Obtain the latest version of Miniconda for your OS at this link. This will download an installer you can run to install Miniconda on your system. Note that if you are using WSL, you will need the Linux installer, and you will have to move this file to WSL before running.
Text-based (terminal) Installation#
You can also use the terminal to download and install the Miniconda compilers using the terminal. If you are using Linux or WSL, type the following into your terminal.
curl -O https://repo.anaconda.com/miniconda/Miniconda3-latest-Linux-x86_64.sh
bash Miniconda3-latest-Linux-x86_64.sh
If you are using a Mac, you should pick the appropriate link for your architecture from the Miniconda installer page.
M1: https://repo.anaconda.com/miniconda/Miniconda3-latest-MacOSX-arm64.sh
x86: https://repo.anaconda.com/miniconda/Miniconda3-latest-MacOSX-x86_64.sh
After installation,
close and reopen your terminal window.
If you do not see (base) before your username on the command line, type
conda init
Creating a conda environment#
A conda environment contains a specific collection of packages you have installed.
This means that packages are isolated, and installed only for a specific environment – you can have several environments each with different installed packages, or different versions of installed packages in different environments.
It’s considered a best practice to create a new Python environment for each project you work on.
This section uses the command line interface (CLI), or terminal, to create an environment using conda.
If you are on Mac or Linux, you will type these commands into your terminal.
If you are on Windows, you will use WSL.
To create an environment for this project using conda,
conda create --name molssi_best_practices "python=3.11"
For other projects, you should replace molssi_best_practices with a descriptive name for your project.
conda also allows you to specify the Python version to use with the environment.
Here, python=3.11 specifies that we want to use Python 3.11 in this environment.
Executing this command will list the environment location and a list of Python packages to be installed.
Choose y(es) when prompted.
Activate the environment using the command
conda activate molssi_best_practices
To see a list of all your environments,
conda info --envs
To deactivate an environment, type
conda deactivate
You can use conda to create environments with different Python versions.
You might be able to see how this could be useful for running old code
(you can change 3.11 in the command above to any version you want),
or testing your code in different Python versions.
Package installation using conda#
Using conda, we can install packages to our environments.
Note: Make sure you have activated the environment where you want to install packages.
conda activate molssi_best_practices
To list all the Python packages installed in an environment, first activate it, then type
conda list
Packages can be installed using the conda install package_name command.
For example, to install NumPy (do not execute this, we will install NumPy later),
conda install numpy
Further, the desired version of NumPy can be specified by adding this following the package name.
For example, if you wanted to install NumPy version 1.15: conda install numpy=1.15
For this workshop, you will need to install the following packages into your environment
NumPy
Matplotlib
JupyterLab
Packages available to Conda are stored within channels.
Some packages are not stored in the default Conda channel, so we need to specify where Conda can find the package with -c followed by a channel name in our installation command.
We will install all of our packages from the conda-forge channel,
so we include the syntax -c conda-forge in our installation command.
You can install multiple libraries at the same time by listing them one after another.
conda install -c conda-forge numpy matplotlib jupyterlab
Installing and configuring git#
Installation#
We will be using the git software for version control during this workshop.
This portion walks you through installing and configuring git.
If you do not have the environment activated, activate it first:
conda activate molssi_best_practices
Next, make sure you have git installed.
You can check if git is installed using the following command in your terminal:
git --version
Make sure that this outputs at least version 2.28. If you do not have git installed, or if it is an older version of git, you can install git using conda:
conda install -c conda-forge git
Note that because of the solver that conda uses to decide which version of a package to install you may end up with a version that is < 2.28.
You can use the same command from above git --version to see what version has been installed.
If the output of that command is < 2.28 you will want to use the following command to specify the version to install. Any version >=2.28 is acceptable.
conda install -c conda-forge git">=2.28"
Configuring Git#
The first time you use Git on a particular computer, you need to configure some things.
First, you should set your identity. One of the most important things that version control like Git does is to keep track of who changes what. This helps repository maintainers coordinate the efforts of all the people who contribute to the project. Most importantly, it makes it easier to figure out who to blame when something goes wrong. You can provide git your name and contact information with the following commands:
Configuring git
In the command below, you do not need to put your name or your email address in all caps.
git config --global user.name "YOUR_FIRSTNAME YOUR_LASTNAME"
git config --global user.email "YOUR_EMAIL_ADDRESS"
Next, you will need to set the name of the default branch git uses. The following command will set your default branch name to “main”
git config --global init.defaultBranch main
Next, you might want to change the Git text editor. As we will see later, certain Git commands will open text files. When this happens, Git will use your environment’s default text editor, which might not be the editor you are most comfortable using. Using configuration commands, you can tell Git to use your favorite editor.
We recommend installing Visual Studio Code as your text editor in the last portion of this set-up.
Note that using VS Code on Windows or Mac requires additional set-up, which is outlined in the section Installing a text editor.
To make VS Code your default editor for git, do
git config --global core.editor "code --wait"
A more complete list of possible editors is available here.
You can check the configuration commands that you have set using:
git config --list
GitHub#
If you do not yet have a GitHub account, you will need to create one. To create an account, navigate to github.com, and click “Sign up”. When creating your GitHub username, remember that this is a professional profile where you can showcase your work. Keeping this in mind, make sure that your GitHub username is both professional and recognizable.
GitHub Credentials#
We will be using the command line interface for GitHub. GitHub very recently deprecated using a username and password from the command line. Instead, you will need to create something called an ssh key to verify your account.
Follow the instructions given by GitHub to create an SSH key and add it to your account.
Text Editor#
Everyone should have a text editor they can use to edit code. If you do not have a preference for text editors, we recommend Visual Studio Code. If you are using WSL, see these instructions for installing Visual Studio Code for use with WSL. If you are using Mac, follow these instructions to set-up VS Code so that you can use it from the command line.
Remote Development Extension (for WSL or ssh)
The Remote Development Extension will allow you to connect to remote machines (like an HPC system) and use VS Code as if it were running on your local machine. This can be very useful for computational scientists.
Note that if you are using WSL, you will have to install this extension to use VS Code with WSL. This is in the above linked instructions.
When using VSCode with the Python extension, you will want to have it use the correct Python version and installation for analyzing your code.
You will want it to use the Python installation and packages that are installed in the molssi_best_practices environment you created earlier.
To set the Python interpreter for VSCode, first open a Python file using the editor.
In order to change the Python interpreter, you will need to have a Python file open.
Open a Python file called test.py by typing
code test.py
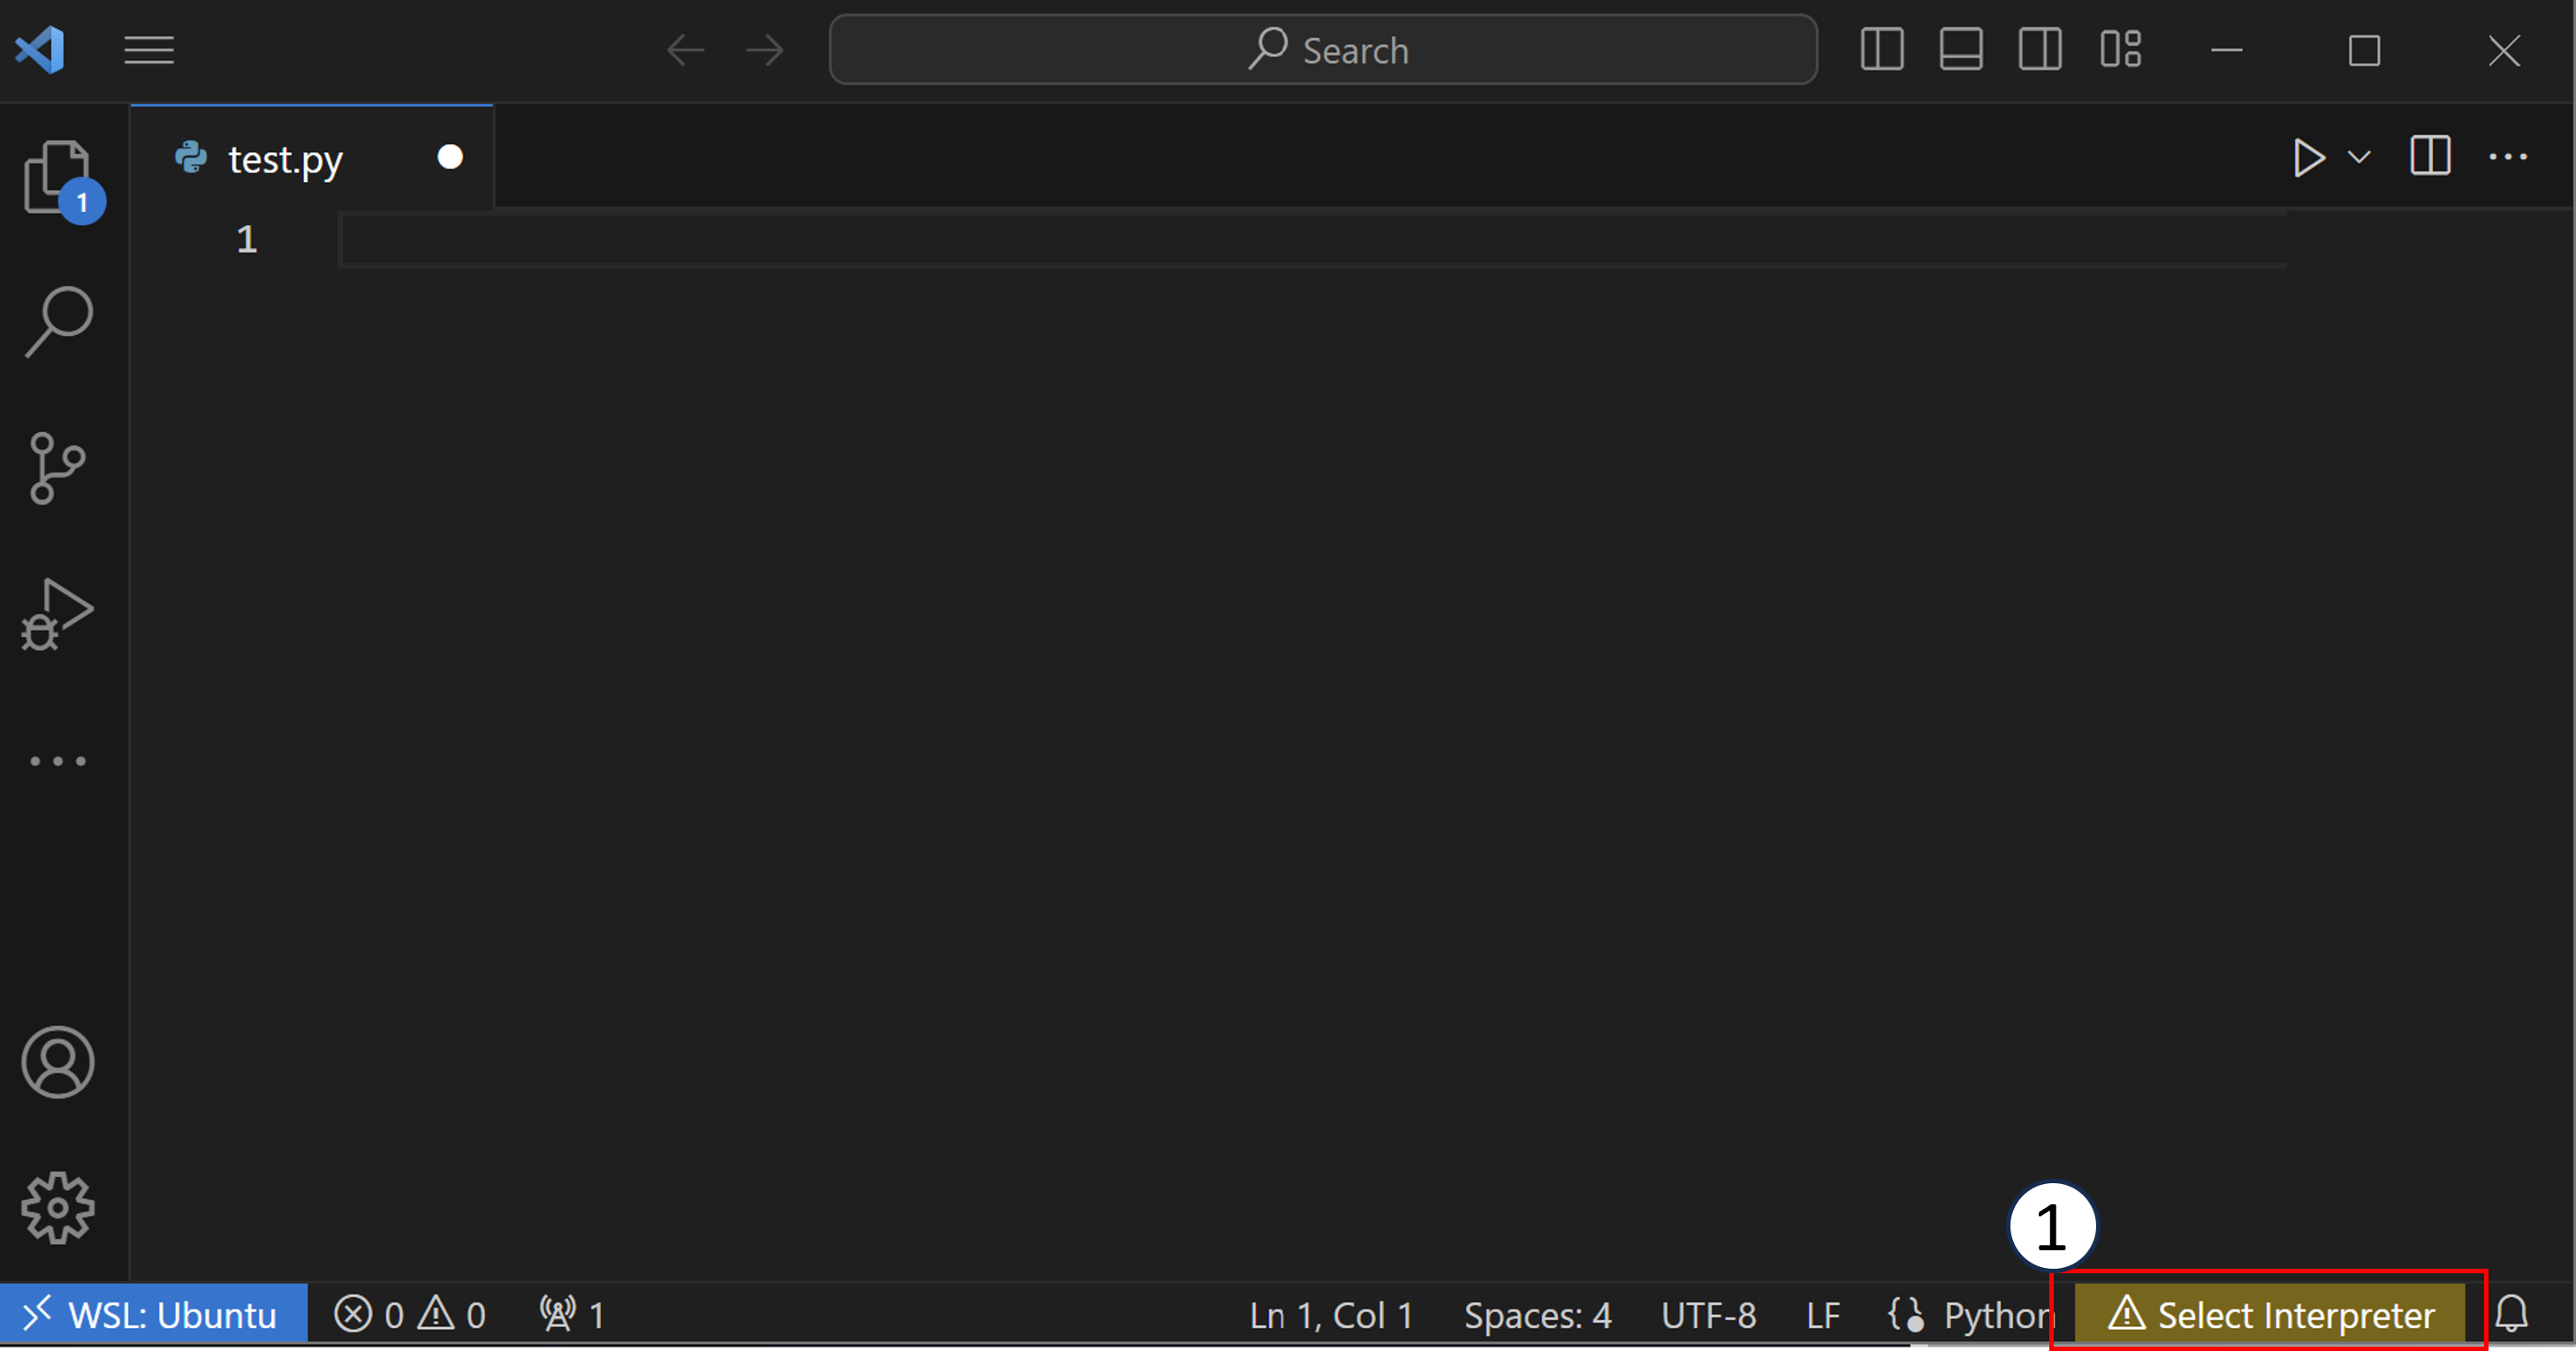
Once you have an editor open, you can click the button on the bottom of VSCode, shown in the screenshot below as (1) (this could also say a Python version like “3.10”). Alternatively, you can open the command palette (Ctrl+Shift+P on Windows/Linux, Cmd+Shift+P on Mac) and type “Python: Select Interpreter”.
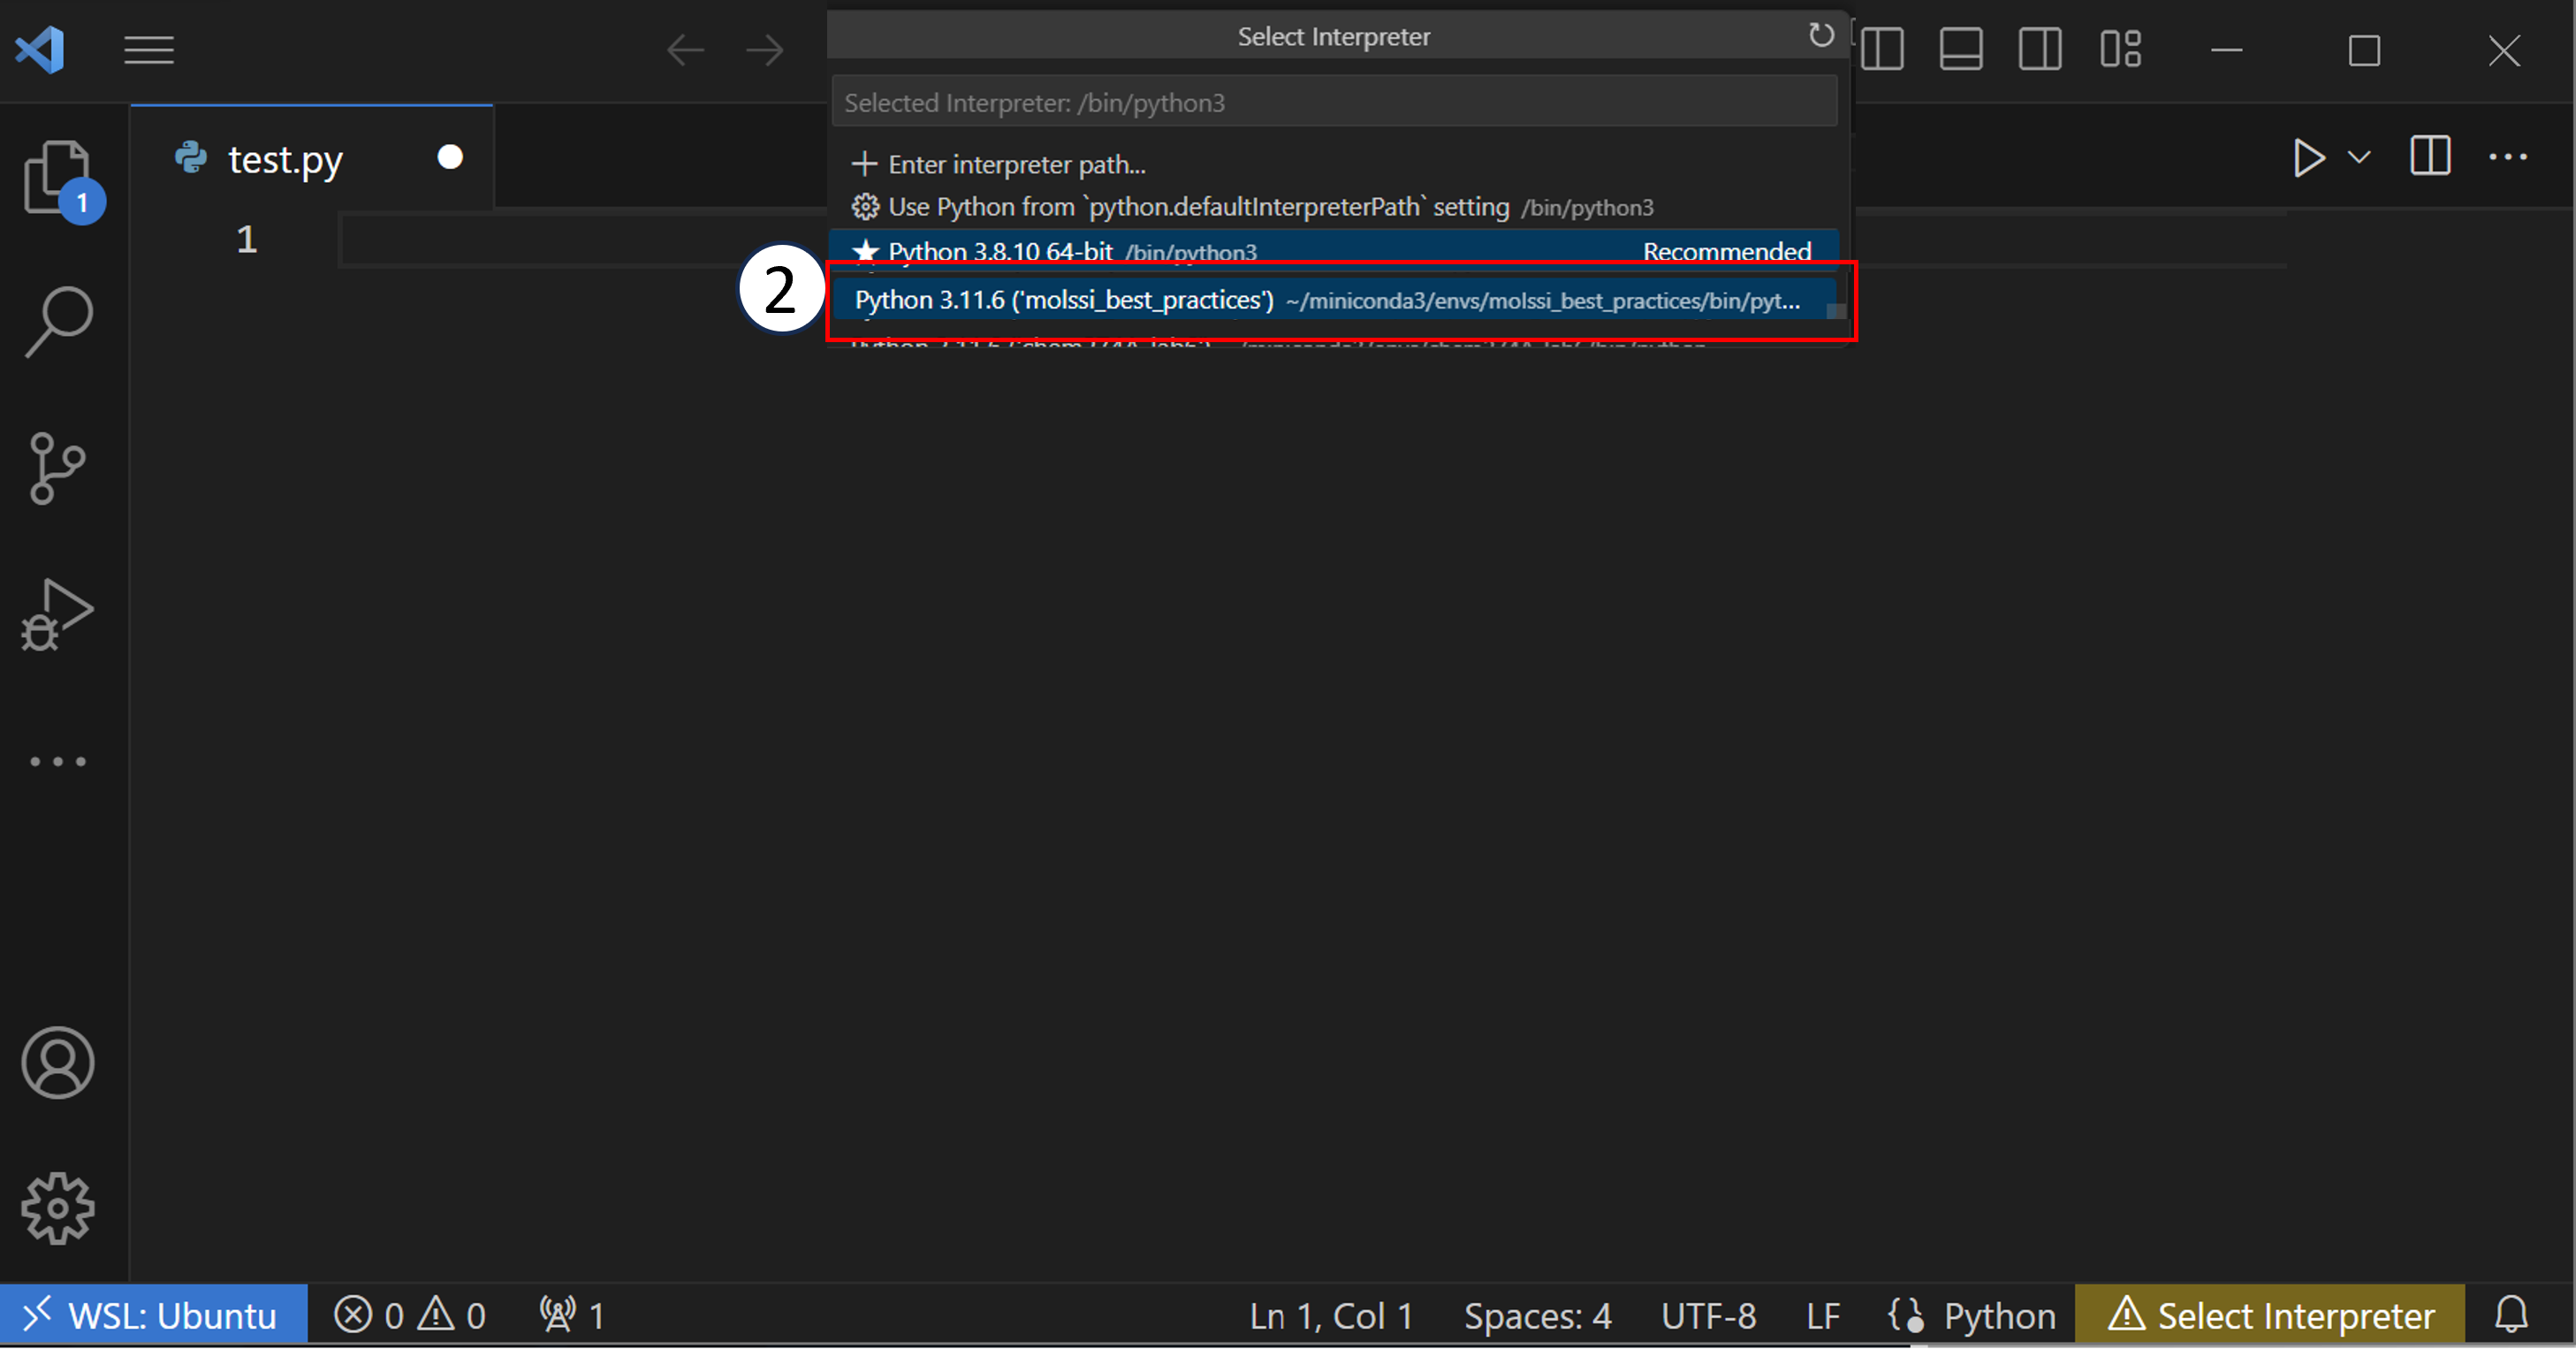
After you have clicked the button, you will see a list of Python interpreters that VSCode can use.
You will want to choose the one that is in your molssi_best_practices environment.
You should do this for every Python file or project that you open in VSCode. Once you have correctly set your Python environment, VSCode can analyze your code as you write it. VSCode will be able to check that certain libraries are installed in your environment or that functions are being called correctly.
Downloading Workshop Materials#
In this workshop, we will be moving code from a Jupyter Notebook into a Python package that we can install and import into other scripts.
Downloading materials from the command line
If you are on WSL or would like to use the command line, you can download the workshop materials using curl
(similar to how you downloaded the Miniconda installer)
Create a folder called
molssi_best_practicesand add the file you downloaded from the step above.The file you download as starting materials will be a
zipfile. You should unzip this file into the folder you have created. (On the command line, you can typeunzip data.zip) After downloading and unzipping, verify that you see the following directory structure.molssi_best_practices └── starting_material ├── data │ ├── pdb │ │ ├── 1bna.pdb │ │ ├── benzene.pdb │ │ └── water.pdb │ └── xyz │ ├── 1bna.xyz │ ├── benzene.xyz │ └── water.xyz └── starting_notebook.ipynb
Conclusion#
At the end of this set-up, you should have created a Python environment (molssi_best_practices) which has Python 3.11, numpy, matplotlib, jupyter, and cookiecutter installed.
You should also have downloaded starting material, installed and created an account on GitHub, and configured Git.